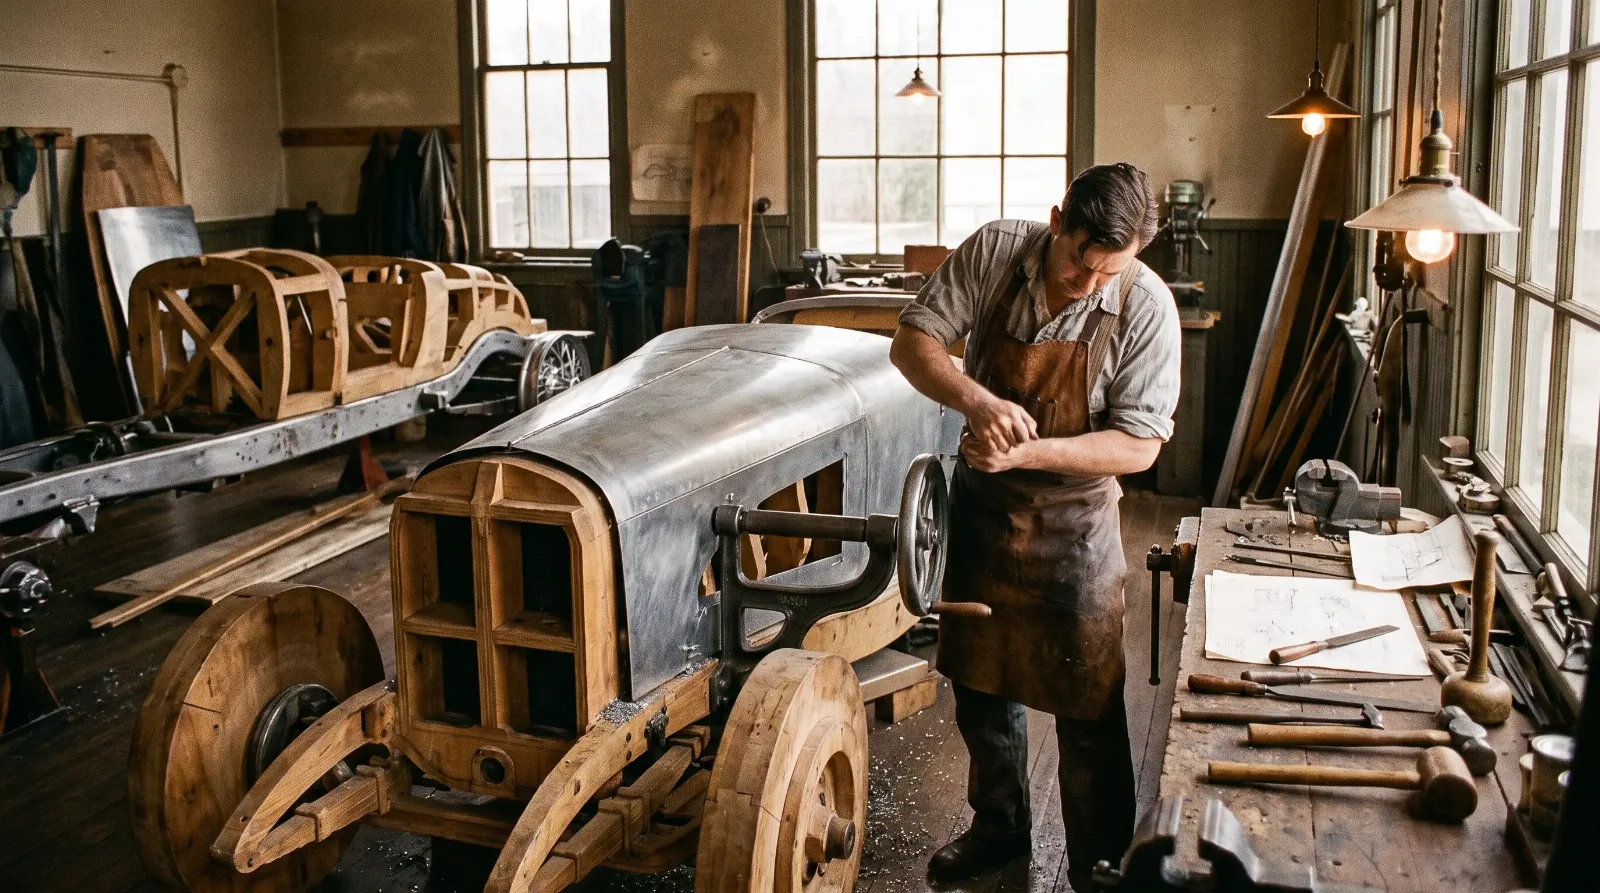

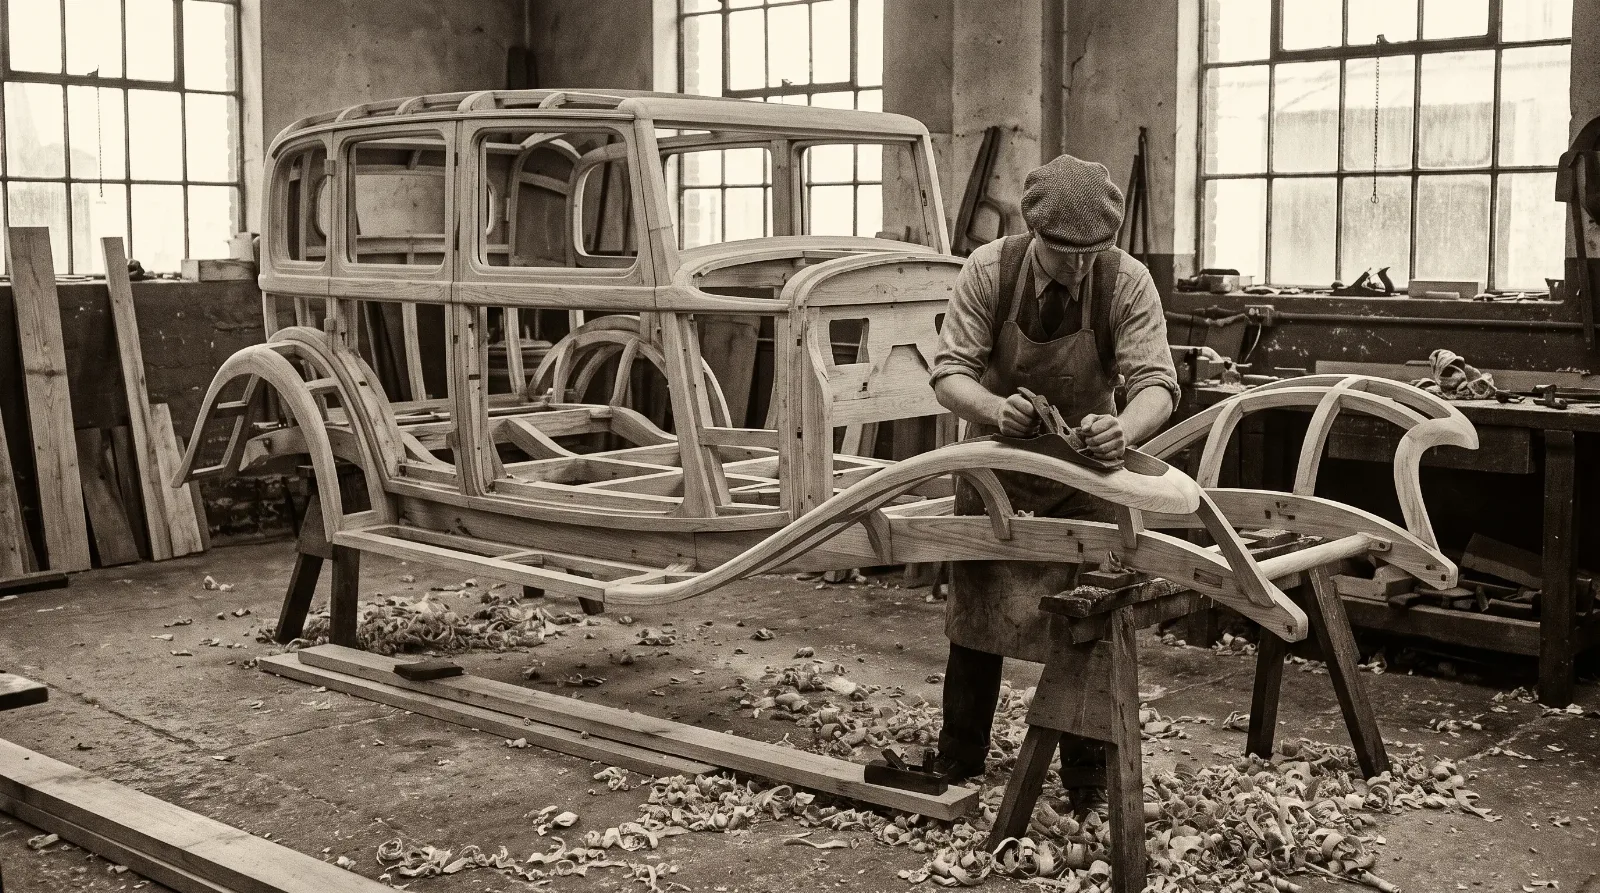
Pull the trim off almost any pre-war coachbuilt body and you will find wood under the metal, not steel structure the way most people assume. Ash, mostly, sometimes oak or hickory for high-stress pieces, cut and joined into a frame that the panels were fastened over. It surprises people every time. A car built by a name as serious as Murphy or LeBaron, and the skeleton holding it together is a piece of furniture-grade joinery with sheet metal skinned on top. That is not a shortcut. It was the standard method, and understanding how it was built tells you almost everything about how to judge and repair one today.
For the wider context of how these bodies got built and sold in the first place, the wood framed car body story covers the coachbuilding trade from the ground up. Here I want to walk through the actual construction, the way I would explain it to someone standing in my shop.
Why wood, not steel
Coachbuilders came out of the carriage trade, where wood framing was the only option, and the skill set carried straight over when automobiles arrived. Wood had real advantages for this kind of work beyond tradition. It was easier to shape by hand into compound curves than steel, easier to repair locally if a panel needed adjustment, and it damped vibration better than an all-metal structure would have on the rough roads of the period. A skilled coachwright could cut and steam-bend an ash rail to a shape that would have taken a steel fabricator far longer and far more equipment to match.
How the frame was actually built
The process started with a full-size wooden buck, essentially a three-dimensional pattern of the finished body built up from the designer's drawings. From that buck, the coachbuilder's joiners cut the actual structural members: sills running the length of the body, pillars rising for the doors and windshield, roof rails, and cross-members tying it all together. Joints were cut by hand, mortise and tenon in the traditional carriage style, then glued and often reinforced with metal brackets or screws at the highest-stress points.
Once the frame stood true, panels went on next. Steel or aluminum sheet was hammered and wheeled to shape over the wood, then screwed or nailed to the frame members with the fasteners' heads set below the surface and puttied over before paint. The wood was doing the structural work. The metal was doing the weatherproofing and the shape you actually see. That division of labor is the single most important thing to understand about how these bodies hold together, because it means a body's strength lives in a material you cannot see once the car is finished.
Fasteners deserve their own mention, because they tell you as much about a body's history as the wood itself. Original construction used screws and small brackets set at specific points the coachbuilder's crew knew by habit, with heads countersunk and puttied so they disappeared under the paint. A body that has been opened up for repair over the decades often picks up extra fasteners in places the original builders never used, a sign of someone patching a problem rather than addressing the wood underneath it. When I am evaluating a car, I look for that pattern of added, mismatched fasteners as a first clue that the frame has a repair history worth investigating further before any restoration estimate gets written.
Where the wood fails first
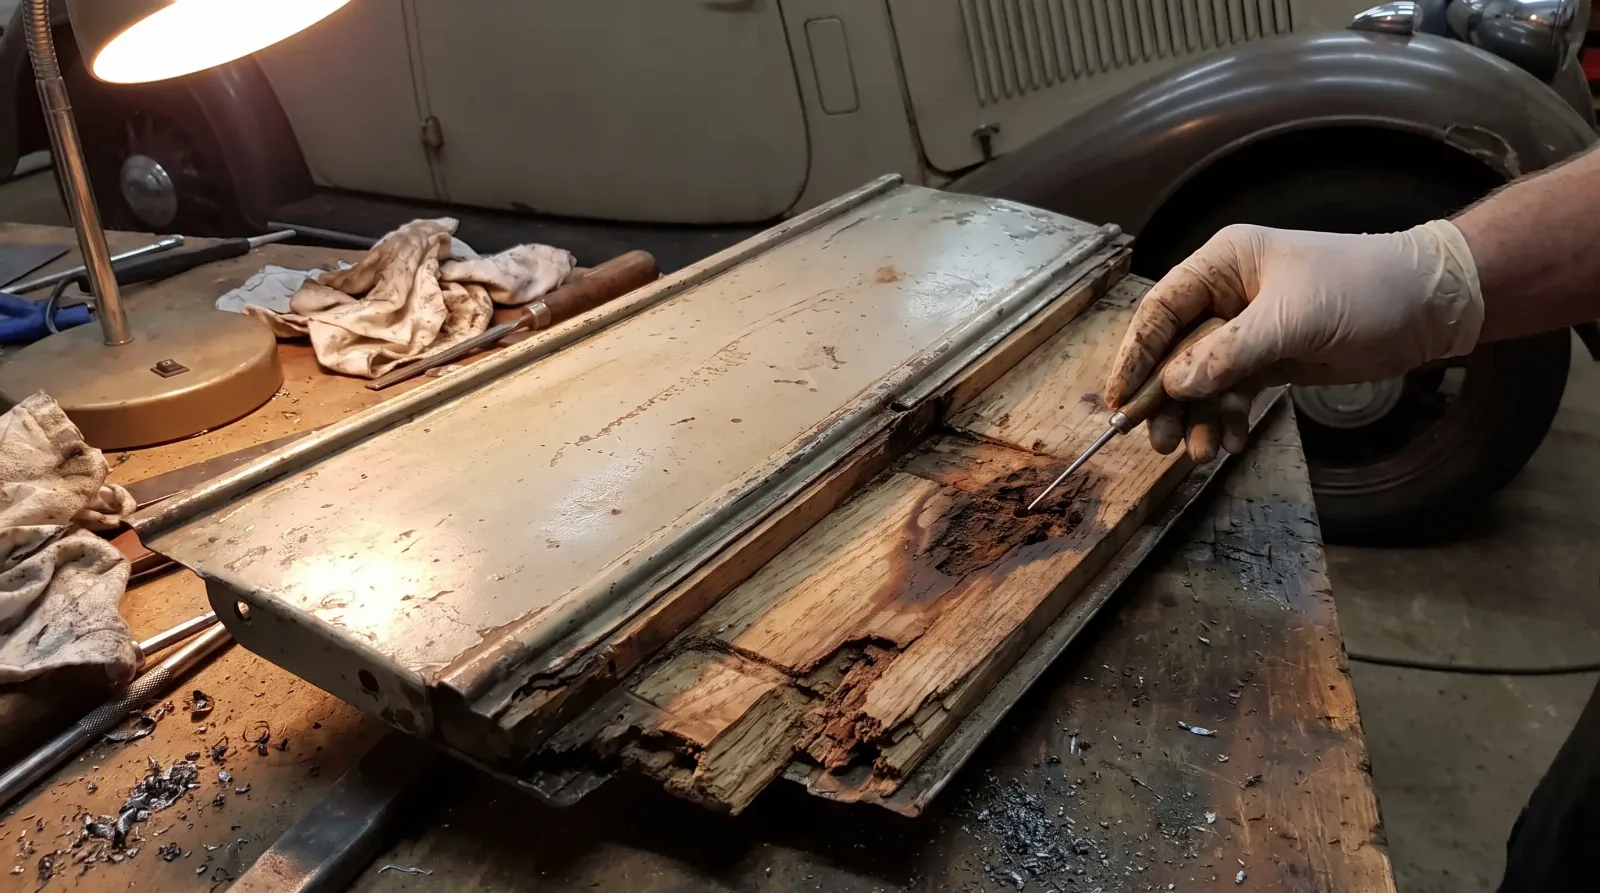
Ash and oak are strong, but they are not immune to water, and water is the enemy on every one of these cars. Sills sit low and catch road spray. Door bottoms trap moisture behind the outer skin where you cannot see it. Roof rails under a fabric-covered top, common on many pre-war bodies, take on water through the covering itself over decades of small leaks nobody ever fixed. Rot does not announce itself. It works quietly inside the structure while the paint on top still looks fine, and by the time a panel visibly sags or a door stops closing right, the wood underneath has usually been compromised for years.
| Frame area | Common failure | How to check |
|---|---|---|
| Sills | Rot from road spray and standing moisture | Probe with an awl at low points, listen for a soft or spongy response |
| Door bottoms | Trapped moisture behind outer skin | Check for sag, uneven gaps, or give when pressed |
| Roof rails | Slow leaks through fabric-covered tops | Inspect from inside where headliner can be pulled back |
| Joints | Glue failure and loosened mortise and tenon joints | Feel for movement or rattle when the body is rocked gently |
"I tell every apprentice the same thing before they touch a coachbuilt body. You are not fixing a car. You are repairing a piece of joinery that happens to have a car built around it, and if you do not respect that, you will build a body that looks right and falls apart in ten years."
— Ray Delgado
Why this matters before you touch a wrench
Knowing the wood is there changes how you evaluate a car and how you plan any work on it. A dent in a panel is a metal problem. A soft spot at the base of a door pillar is a structural problem, and treating it like the former instead of the latter is how restorations go sideways. I always tell people to find the wood before they price a job, because a panel-only estimate on a car with rotted framing is not an estimate at all. It is a guess that is going to grow once the trim comes off and the truth is visible. Once you understand the frame, the actual repair work, replacing rotted members and refitting the panels back to true, is its own long process, and I walk through exactly how that goes in the next installment.