
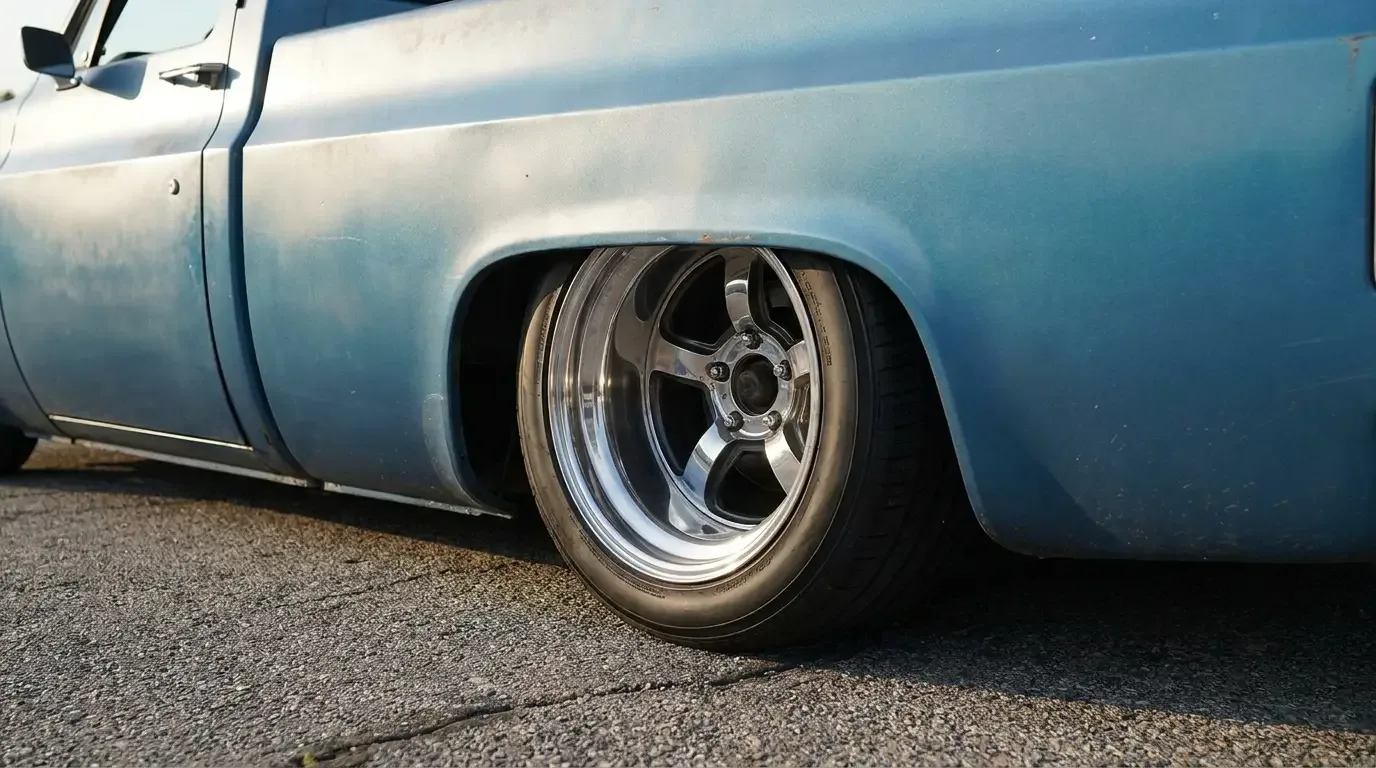
A stock C10 bed was drawn around a tire that's narrow by today's standards, and the wheel tub sitting inside it reflects that. Drop the truck and go wide out back, and the first thing that happens is the tire meets sheet metal long before it meets full steering lock or full compression. You can chase that problem with smaller tires and softer springs for a while. Eventually, if you want real width under the bed, you tub it. That means cutting out the factory wheel well and building a new one that moves out into the bed floor, not just up into the wheelhouse.
Restoration & Tech
7 min read
How to Wheel-Tub a C10 Bed for Wide Rear Tires
How to decide between a mini-tub and a full tub, measure correctly, and fabricate a new wheelhouse panel that clears wide rear tires on a lowered C10.
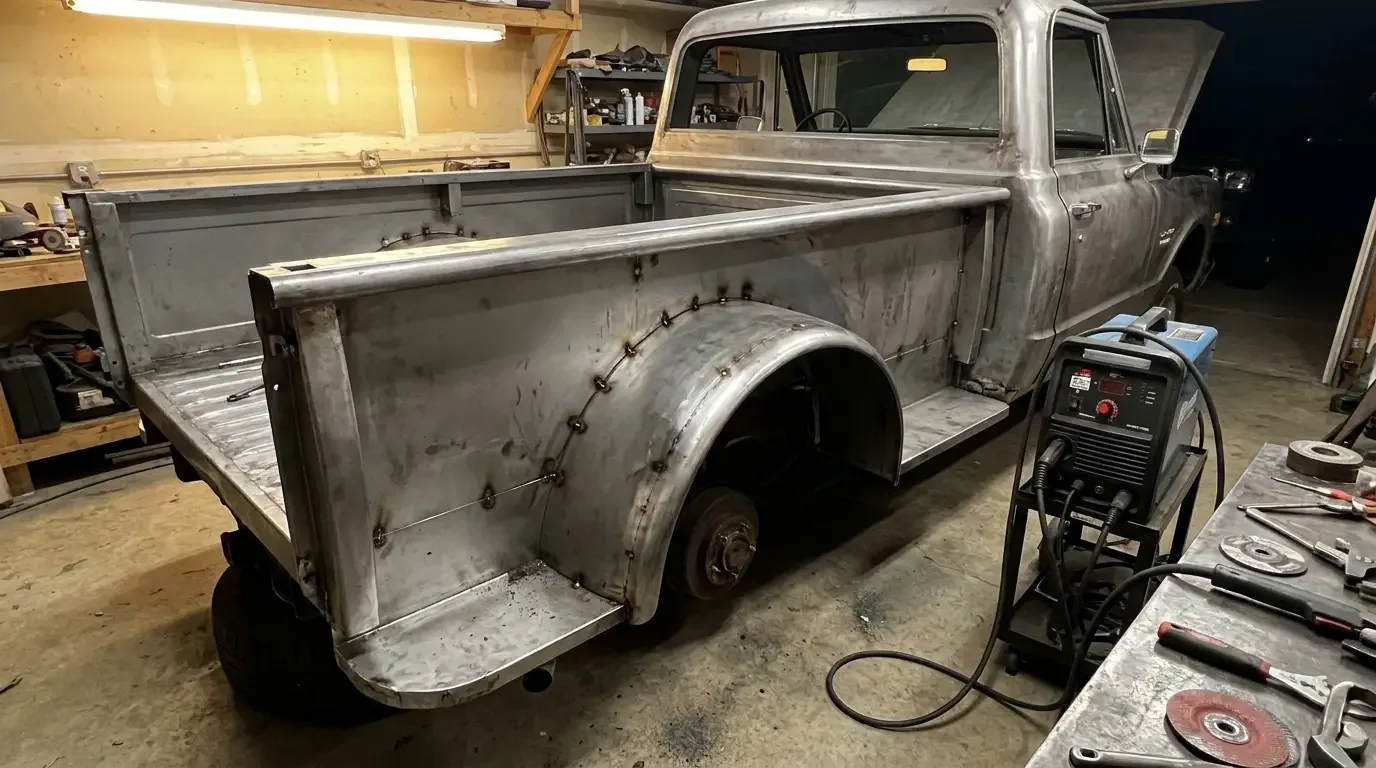
Before anything gets cut, decide how much bed you're willing to give up, because that decision drives every measurement after it. A lot of guys skip straight to the cutting wheel because they've watched the lowering process happen already, followed the lowering guide, and now the tire rubs. Slow down. Tubbing is a one-way modification. You don't get the bed floor back the way it came.
Mini-tub or full tub: deciding how much bed you're giving up
A mini-tub moves the inner wheelhouse out two to three inches per side, enough to clear a moderately wider tire without touching the bed floor's structural ribs or the wood strip mounting rails if the bed still has them. It's the right call for a truck that's staying somewhat streetable, with a bed that still hauls things occasionally. A full tub reshapes the wheelhouse and the floor around it, sometimes tying into a narrowed rear end and relocated bed floor supports, and it's built for a specific tire, not a range of tires. Full tubs are common on pro-street and drag-oriented C10 builds where the bed is cosmetic at that point.
Measure your actual tire, mounted on the actual wheel, at actual ride height, before you pick one. Don't tub for a tire you might run someday. Build for the tire on the truck, or the specific tire and offset you've already bought.
| Approach | Typical width gain per side | Bed floor affected | Best for |
|---|---|---|---|
| Mini-tub | ~2-4 in per side | Wheelhouse only, floor stays intact | Street trucks keeping some bed function |
| Full tub | ~5-8 in per side | Wheelhouse and adjacent floor reshaped | Drag and pro-street builds, cosmetic bed |
Measuring before you cut anything
Mount the tire and wheel, set the truck at final ride height on the suspension it's actually going to run, and measure clearance at full compression, not static height. A tire that clears fine sitting on jack stands can hit sheet metal the first time you load the bed or hit a dip, because the axle moves up into the wheelhouse under compression, not down. Roll the tire through its full arc if you're running anything with rear steer or a solid axle that can walk laterally under load.
Mark the tire's widest point with the wheel at its actual backspacing. This matters more than people expect. A wheel with less backspacing pushes the tire further out toward the fender, which changes where you need clearance versus how much you need. Get getting the wheel offset right to fit in that tub settled before you commit to a tub width, because building a tub around the wrong offset means building it twice.
Transfer those measurements to the truck with tape and a straightedge, not by eye. Mark the actual cut line on the inner wheelhouse before the plasma cutter or cutoff wheel comes out. Once metal is gone, a mismeasurement costs you a patch panel and a redo, not just an eraser mark.
Building the new wheel well panel
Cut the factory wheelhouse out in one piece if you can, it gives you a pattern to reference even after it's on the bench. Fabricate the new tub section from 18-gauge sheet, formed on an English wheel or shrunk and stretched by hand if you don't have one, matching the crown and curvature of the factory wheelhouse where it transitions into the bed floor. This isn't a flat patch. The factory panel has compound curves for a reason, it sheds water and it's structurally stiffer than a flat sheet would be, and a tub panel that ignores that geometry oil-cans and cracks at the welds within a season.
Tack the new panel in from multiple points before you commit to a single weld pass. Work around the panel, tacking opposite points, the way you'd torque a head, not working in one continuous line from one end to the other. A continuous weld pass on thin sheet pulls heat in one direction and warps the panel as you go, and by the time you're three-quarters around it, the last quarter doesn't fit the gap you built it for anymore.
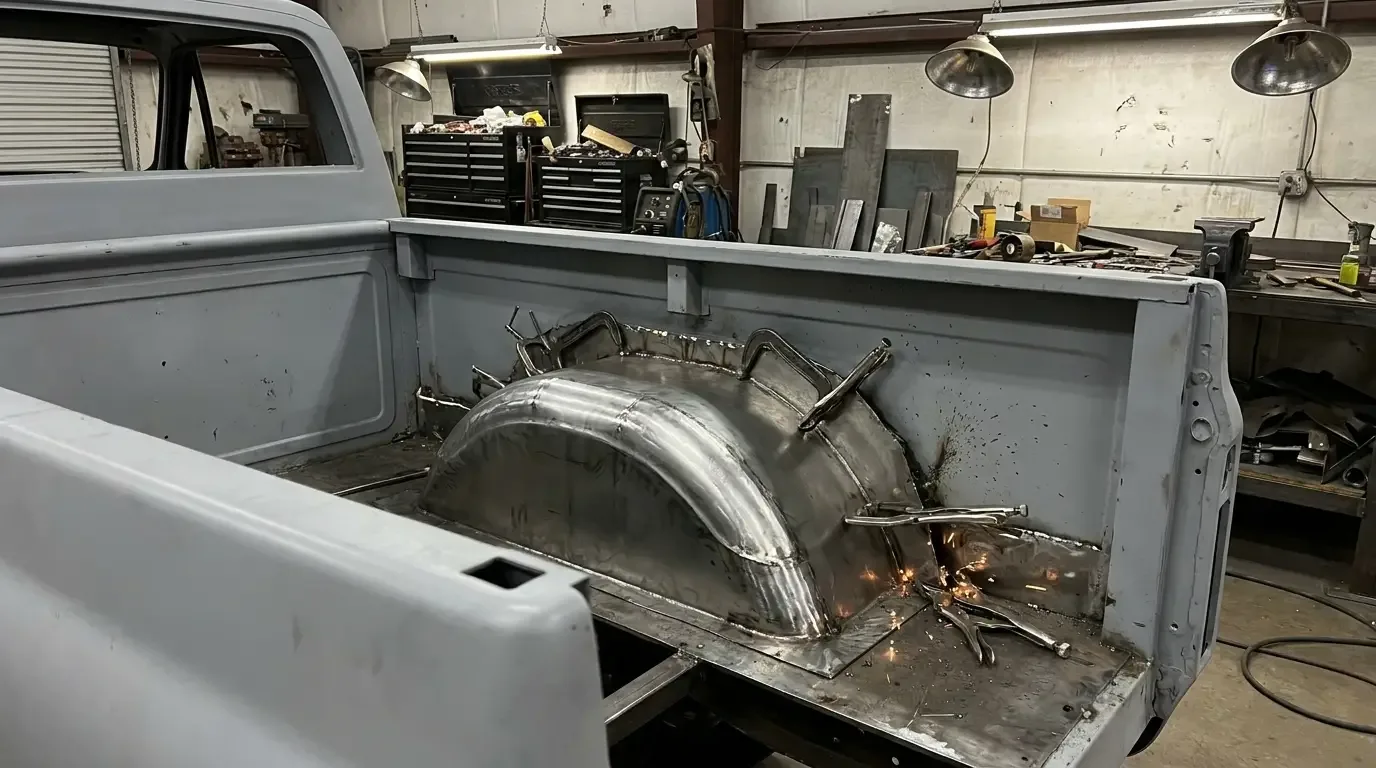
Welding it in without warping the bed floor
Tack, skip, cool, repeat. Stitch weld an inch, move to a point on the opposite side of the panel, weld another inch, and let the metal dissipate heat between passes. Trying to lay one continuous bead around a full tub panel on 18-gauge sheet is how you end up with a wavy bed floor that no amount of filler hides for long, because the wave is in the metal, not on top of it.
Back-purge or at minimum have a heat sink, a wet rag or a piece of aluminum, behind thin sections if you're TIG welding and worried about blow-through near an edge. Grind welds flush in stages as you go rather than saving all the grinding for the end, it lets you see distortion early instead of finding out after the whole tub is welded solid that one section pulled a quarter inch out of alignment.
"Box the frame before you touch the body. Z it after and you're chasing your own tail, because every measurement you took just moved. Tubbing a bed follows the same logic. Get your suspension and ride height locked first. A tub built around a guess doesn't fit the truck once the truck settles."
Ray Delgado
Finishing: floor bracing, seam sealer, and fuel tank clearance
The factory bed floor has cross bracing underneath that ties into the wheelhouse structure, and a tub job that removes that bracing without replacing it leaves the floor soft even if the visible sheet metal looks clean. Fabricate new bracing that follows the new tub's shape, tie it into the frame or bed mounts the way the factory pieces did, and don't consider the job finished until the floor is as rigid loaded as it was before you cut it.
Check fuel tank and filler neck clearance before final assembly if your tank sits anywhere near the modified area. A tub that looks perfect from underneath the truck but sits an inch from a fuel line under hard suspension travel is a problem you want to find on the bench, not after the truck's back together and full of gas. Seam seal every joint from the inside, prime and paint before the bed floor goes back in, and pressure test the wheelhouse area for water intrusion with a hose before you call the metalwork done. A tub job that leaks rusts from the inside where you can't see it until the floor's already compromised again.
Sources and notes
- AMD tech article on installing wider wheel tubs in a 1960-1966 Chevy C10
- CJ Classic Trucks short bed floor assembly with 4-inch wider mini-tubs, 1967-1972 Chevrolet C10
- Munssey Speed 3-inch wheel tub spec for 1973-1987 C10/GMC trucks
- Auto Metal Direct wide wheel tubs for 67-72 and 73-87 C10
- Chevy Tri-Five Forum discussion on mini-tub versus full tub tradeoffs
Related Reading
Have a
Chevrolet C10
for Sale?
Reach thousands of serious classic car collectors across the US.
Sell It Here →
Are You a Classic Car Dealer?
List your full inventory and connect with targeted classic car buyers.
Join as a Dealer →

About the author
Ray Delgado
Metal fabricator and chassis builder who has spent 25 years turning flat sheet and mild steel into hot rods, gassers and restomod underpinnings.
Related Listings - Chevrolet C10
More in Restoration & Tech




Comments
Be the first to comment on this article.