
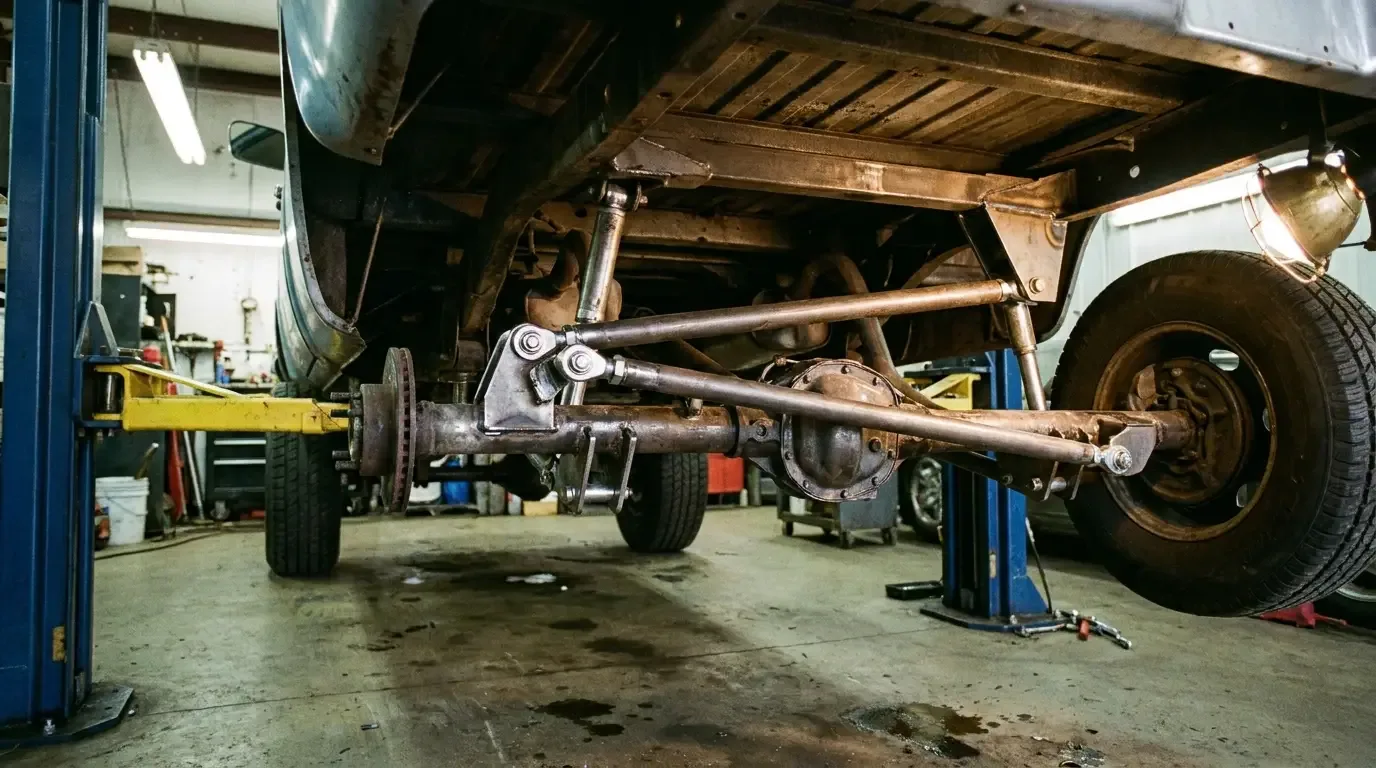
A C-notch removes material from the top of the rear frame rail, right where the axle housing wants to travel upward, so a lowered truck gets more room before metal hits metal. It's not a cosmetic modification. It's a structural one, and that's the part people rush past when they see a kit online and figure it's just cutting a notch shape and welding a cap over it.
Restoration & Tech
6 min read
Step-by-Step C-Notch Installation for a C10 Rear Frame
A fabricator's walkthrough of installing a C-notch in a C10 rear frame, from boxing the rail before you cut to gusseting the notch so it holds up under load.
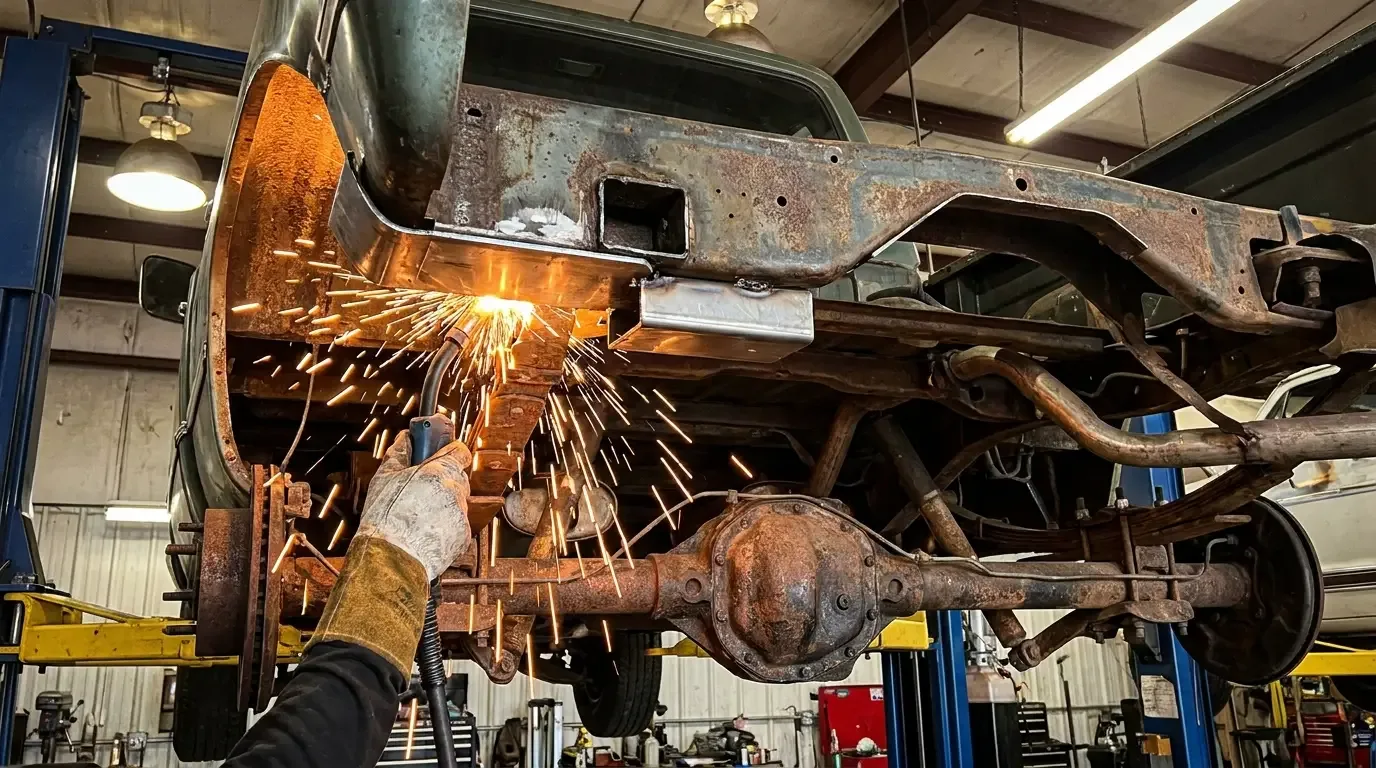
Box the frame before you touch it with a cutoff wheel. That's not a suggestion, that's the order the job goes in, because once you notch a rail that isn't boxed, you've weakened a section that was already carrying load, and now it's carrying that same load with a chunk removed and nothing added back yet.
What the notch actually has to clear
Before you cut, know exactly what you're clearing room for. Lower a C10 enough and the rear axle housing, at full compression over a bump, will contact the frame rail before the suspension runs out of travel on its own. The notch buys back that clearance by reshaping the rail around the housing's path instead of just accepting the contact.
How much notch you need depends on the rear suspension design under the truck. A truck running the rear suspension design that notch has to clear moves the axle through a different arc than a leaf-spring setup does, and the notch depth and shape has to match that arc, not a generic template. Measure your own truck's travel before you order a kit or lay out a cut. Don't copy another builder's notch dimensions off a forum post and assume it transfers.
| Notch style | Typical clearance gained | Frame strength impact |
|---|---|---|
| Stock C-notch | 2-3 inch | Moderate, needs boxing and gussets |
| Extended/double notch | Roughly 3-5 inch, varies by kit and axle housing shape | Significant, requires full boxing plus internal sleeve |
| Tub-style notch | 4 inch or more, kit- and application-specific | Heaviest cut, mandatory internal structure |
Before you cut anything
Jig the truck before the frame goes anywhere near a cutoff wheel. Support it level, front and rear, on jack stands rated for the weight, and check that the frame is level side to side and front to back before you take a single measurement off it. A frame that's sitting twisted on uneven stands will give you a notch that's cut to a lie, and you won't find out until the truck's back on four wheels and something doesn't line up.
Box the frame section around where the notch is going before you cut it. Boxing means welding a plate across the open C-channel of the rail, turning it into a closed tube section, and it needs to happen on both sides of the planned notch location, not just one. Z it after you box it and you're fighting yourself, because every reference point you measured off the boxed section just shifted once you start reshaping it further back. Get the sequence right: box first, notch second.
Cutting and fitting the cap
Mark your cut lines off the actual axle housing at full compression, not off a printed template held up to the frame. Every truck's ride height and axle position is a little different once you've already done suspension work, so measure your specific truck, chalk the line, and check it twice before the cutoff wheel touches steel.
Cut the notch shape out of the rail, then fit the cap, the curved piece that replaces the material you removed and reshapes the rail around the housing's arc. A good cap follows the housing's actual travel path with margin, not a tight fit that clears today and contacts again the first time a shock bottoms out on a rough road. Tack it in a few spots first, check clearance through full suspension travel by hand or with the truck on a lift, and only go to final weld once you've confirmed the fit at both full compression and full droop.
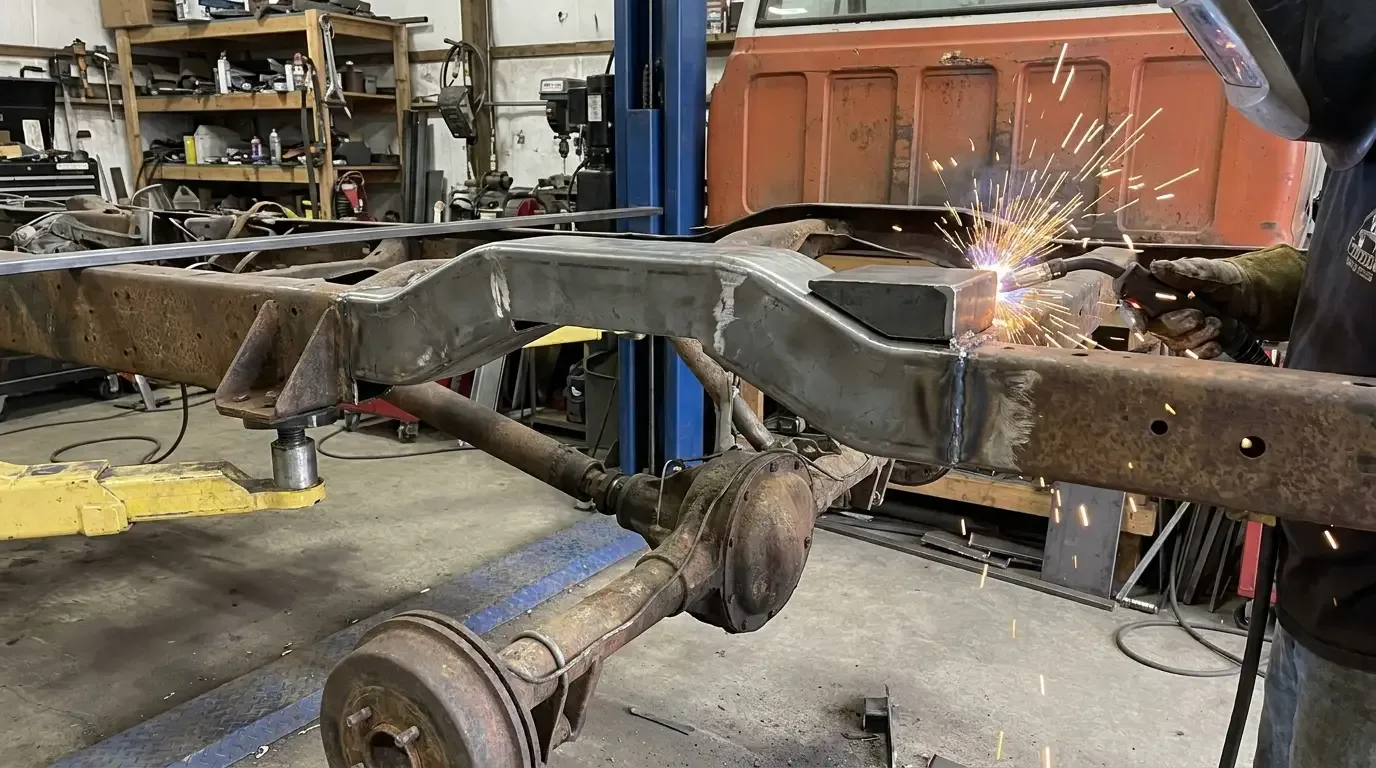
Welding it in right
TIG is the preferred process here if you've got the skill and the machine for it, since it gives you the control to lay a clean, full-penetration weld on frame steel without blowing through thin sections. MIG done properly by someone competent is acceptable too. What isn't acceptable is a stitched-together weld with gaps, or a bead that looks pretty on the surface but never fully fused to the base metal underneath.
Add internal gussets or a sleeve inside the notched section once the cap is welded, especially on anything beyond a mild stock-depth notch. The gusset is what actually returns the strength you removed by cutting the rail in the first place, and skipping it because the cap alone "looks strong enough" is how a notched frame rail eventually cracks at the weld line, usually right where the cut met the original rail material.
"A notch that isn't gusseted is just a frame with a hole in it and a pretty weld over the hole. The gusset is the part nobody sees and the part that actually matters. Skip it and you're borrowing strength you never paid back."
Ray Delgado
Testing travel before you call it done
With the truck back on its wheels, cycle the rear suspension through its full range, either on a lift or by driving it over the roughest surface you can find at low speed, and check for contact between the axle housing and the new notch at every point in that travel. A notch that clears at static ride height but contacts under hard compression didn't solve the problem, it just moved where the truck hits.
This work only makes sense as part of a full lowering plan, not a standalone cut done because a notch "looked necessary." Anyone doing this should already be working through the C10 lowering guide for the full sequence, front to rear, so the notch depth matches the actual ride height the rest of the suspension work is targeting instead of guessing at a number and cutting twice.
Sources and notes
Related Reading
Have a
Chevrolet C10
for Sale?
Reach thousands of serious classic car collectors across the US.
Sell It Here →
Are You a Classic Car Dealer?
List your full inventory and connect with targeted classic car buyers.
Join as a Dealer →

About the author
Ray Delgado
Metal fabricator and chassis builder who has spent 25 years turning flat sheet and mild steel into hot rods, gassers and restomod underpinnings.
Related Listings - Chevrolet C10
More in Restoration & Tech




Comments
Be the first to comment on this article.