
Ask ten guys at a show what makes a traditional rod sit right and you will get ten answers, but two of them will come up every time: the suicide front end and the Z'd frame. Both are chassis tricks, not body tricks, which is why they get less ink than a good chop. They are also the difference between a car that looks like it is crouching and a car that just looks like a stock body dropped onto stock rails. If you want the low, mean stance that reads "hot rod" from fifty feet away, you learn how these two work, what they cost you, and where they bite. This is part of a bigger conversation on how to build a hot rod, but the chassis is where the whole look lives or dies.
Restoration & Tech
8 min read
Suicide Front Ends and Z-ing the Frame
A suicide front end and a Z'd frame are the two chassis tricks that give a traditional rod its low, reaching stance. Here is how they work.
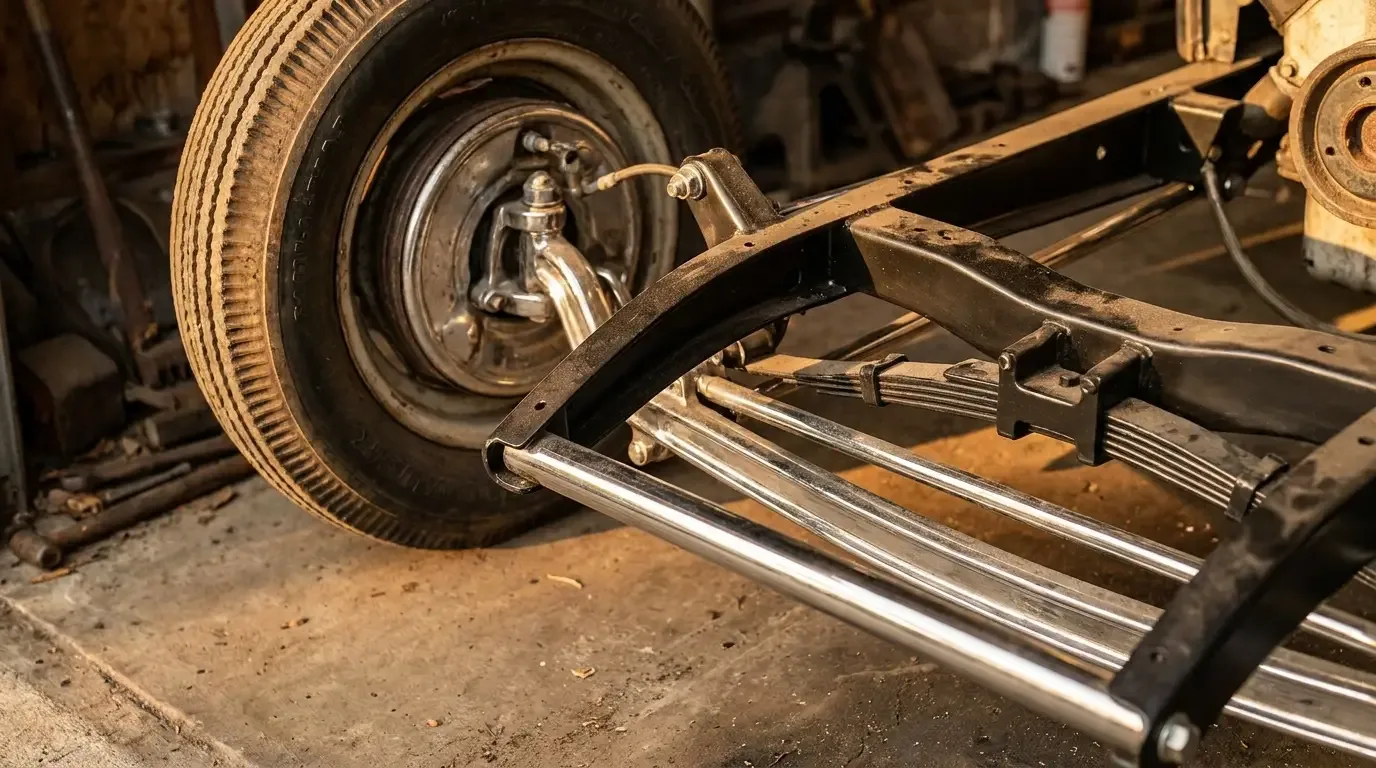
What a suicide front end actually is
A suicide front end hangs the front axle out ahead of the frame instead of tucking it under the rails. On a stock early Ford, the front crossmember sits back a bit and the axle rides more or less below the front of the frame. On a suicide setup, you build a bracket, a perch, sometimes a dropped tube, that carries the axle forward of the frame horns. The wheels move out front, the wheelbase stretches a couple of inches, and the nose of the car appears to reach for the road.
The name is old and blunt. It came from the same well as "suicide doors," the rear-hinged doors that swing into the wind. The implication was always that the mounting was hanging out there with less holding it than a factory engineer would want. That reputation is half showmanship and half real. A suicide perch puts the axle load out on a cantilever, and if the bracketry is thin or badly welded, you are trusting a lot of geometry to a small amount of steel.
Done right, though, it is a clean, honest way to get the front wheels out where a fenderless roadster wants them. It pairs naturally with a dropped I-beam axle and hairpins or a split wishbone. The look is pure early-fifties dry-lakes attitude, the same era of thinking that produced the Choosing a Hot Rod Chassis and Suspension decisions every builder still argues over.
Z-ing the frame and why builders do it
Z-ing the frame is a cut. You take a section of the frame rail, usually at the front over the axle and often at the rear over the differential, and you cut a Z-shape into it so the rail steps up. Weld it back together with the middle of the car now sitting lower relative to the axle centerline, and the whole body drops closer to the ground without touching the suspension travel.
Think of it this way. The axle can only go so high before it hits the frame. If you want the frame lower but you still want the tire to move up and down under the rail, you have to route the rail up and over the axle. That step up is the Z. A front Z lets the nose sit down hard. A rear Z lets the tail drop over the rear end so you do not drag the pan on every driveway. Builders talk about a "two-inch Z" or a "four-inch Z", meaning how much vertical step got cut in.
The payoff is a real drop in ride height that you cannot fake with lowering blocks or a bigger axle drop alone. It is how you get a channeled-looking stance on a car you did not channel, or how you push an already low car into the weeds. It is a permanent, structural change, which is exactly why it belongs in the same toolbox as the Choosing a Hot Rod Chassis and Suspension work rather than the bolt-on catalog.
| Technique | What it changes | Main visual payoff | Reversible |
|---|---|---|---|
| Suicide front end | Axle moves ahead of frame horns | Wheels out front, longer reach, aggressive nose | Yes, if bracket-mounted |
| Front Z | Frame steps up over front axle | Nose sits low, front rake | No, structural cut |
| Rear Z | Frame steps up over rear axle | Tail drops, clears the diff | No, structural cut |
| Dropped axle (for reference) | Lowers spindle relative to beam | Modest drop, keeps geometry | Yes, swap axle |
The look these two build together
Neither trick lives alone. A suicide front end throws the wheels forward and a front Z drops the rail down onto them. Run them together and the front of the car sits low and reaches out at the same time. Add a slight rear rake, the tail a touch higher than the nose, and you have the profile that has defined a proper traditional rod since the fifties.
Stance is not one adjustment, it is the sum of axle drop, Z, spring choice, tire diameter, and where the body sits on the rails. The suicide front end and the Z are the two that do the heavy lifting up front. Get them wrong and the car looks tall and uncertain. Get them right and it looks like it is moving while parked.
"A Z'd frame and a suicide perch are not decoration. They are how the car earns its stance. I have seen guys spend a fortune on paint and wheels and then wonder why it still sits like a grocery-getter. It sits like a grocery-getter because nobody touched the rails."
Ray Delgado
The trade-offs, and where they bite
Nothing about lowering a car is free. A suicide front end puts the axle on a cantilever ahead of the frame, so bracket design and weld quality matter more here than almost anywhere else on the chassis. Thin steel, a cold weld, or a bracket that flexes will show up as bump steer, shimmy, or worse. This is not the place to guess. If you are not confident boxing and gusseting the mount, that is a job for someone who has done it and can show you cars still on the road.
Z-ing the frame trades ground clearance for looks, plainly. A front Z that drops the nose two inches is two inches you no longer have over speed bumps and steep driveways. It also changes your suspension geometry and can crowd the oil pan, steering, and headers, so it has to be planned with the drivetrain, not after it. And because it is a permanent cut, a bad Z is expensive to undo. You are rewelding structural rail.
- Suicide mounts change the steering geometry. Recheck bump steer and Ackerman after any change out front.
- A Z shortens usable suspension travel if you are not careful; make sure the tire still clears the stepped rail at full compression.
- Both affect where the engine and trans sit, so mock up the drivetrain before you cut.
- Show cars can get away with extremes a driver cannot. Be honest about how the car will actually be used.
Builder detail: measuring twice before you cut once
The old rule earns its keep here more than anywhere. Before a torch touches the rail, a careful builder sets ride height with the body mocked on the frame, the intended tires on, and the drivetrain roughly in place. You measure the gap you want, then you figure the Z that gets you there, then you check that nothing important lands where the step now sits.
On the suicide end, the fussy work is the bracket. It carries the axle, the braking loads, and every pothole, all on a mount that sticks out past the frame. Good shops box the front horns, tie the perch into the crossmember, and gusset the whole assembly so it is not relying on a couple of tack-shy welds. The same care that goes into lead work and finish belongs under the car where nobody claps for it.
None of this is exotic. It is layout, a good tape measure, a level, and the patience to mock things up twice. The guys whose cars still look right decades later did the boring part first. The stance everyone photographs is downstream of an afternoon spent on a jack stand with a plumb bob.
Sources and notes
- Period hot-rod press and how-to features on chassis fabrication and frame modification.
- Traditional rod-building references on suicide front-axle mounting and frame Z technique.
- Builder interviews and shop practice on bracket design, boxing, and gusseting.
- Show and registry records documenting stance conventions on early Ford-based rods.
Related Reading
Have a
Classic Car
for Sale?
Reach thousands of serious classic car collectors across the US.
Sell It Here →
Are You a Classic Car Dealer?
List your full inventory and connect with targeted classic car buyers.
Join as a Dealer →
#hot rod chassis
#hot rod stance
#traditional hot rod
#suicide front end
#z-frame
#frame fabrication

About the author
Ray Delgado
Metal fabricator and chassis builder who has spent 25 years turning flat sheet and mild steel into hot rods, gassers and restomod underpinnings.
More in Restoration & Tech




Comments (1)
R
Rick Fontaine
2 weeks ago
Two-door versions always carry a premium, but the wagons are starting to get serious collector attention. Keep that in mind if you're budget-conscious.