
The pumps get the glory. Chrome tanks, engraved blocks, dumps you can hear from a block away. But the pumps are only as good as the electrical system feeding them, and that system starts with a rack of batteries bolted in the trunk. Get the battery bank wrong and it does not matter what you spent on the rest. Your car will lift slow, hit soft, and die in the middle of a hop with a trunk full of dead lead.
Restoration & Tech
8 min read
Lowrider Batteries, Pumps and Setups
Sizing 6, 8, and 10-battery banks, choosing pumps and solenoids, wire gauge, grounds, and charging a lowrider hydraulic setup right.
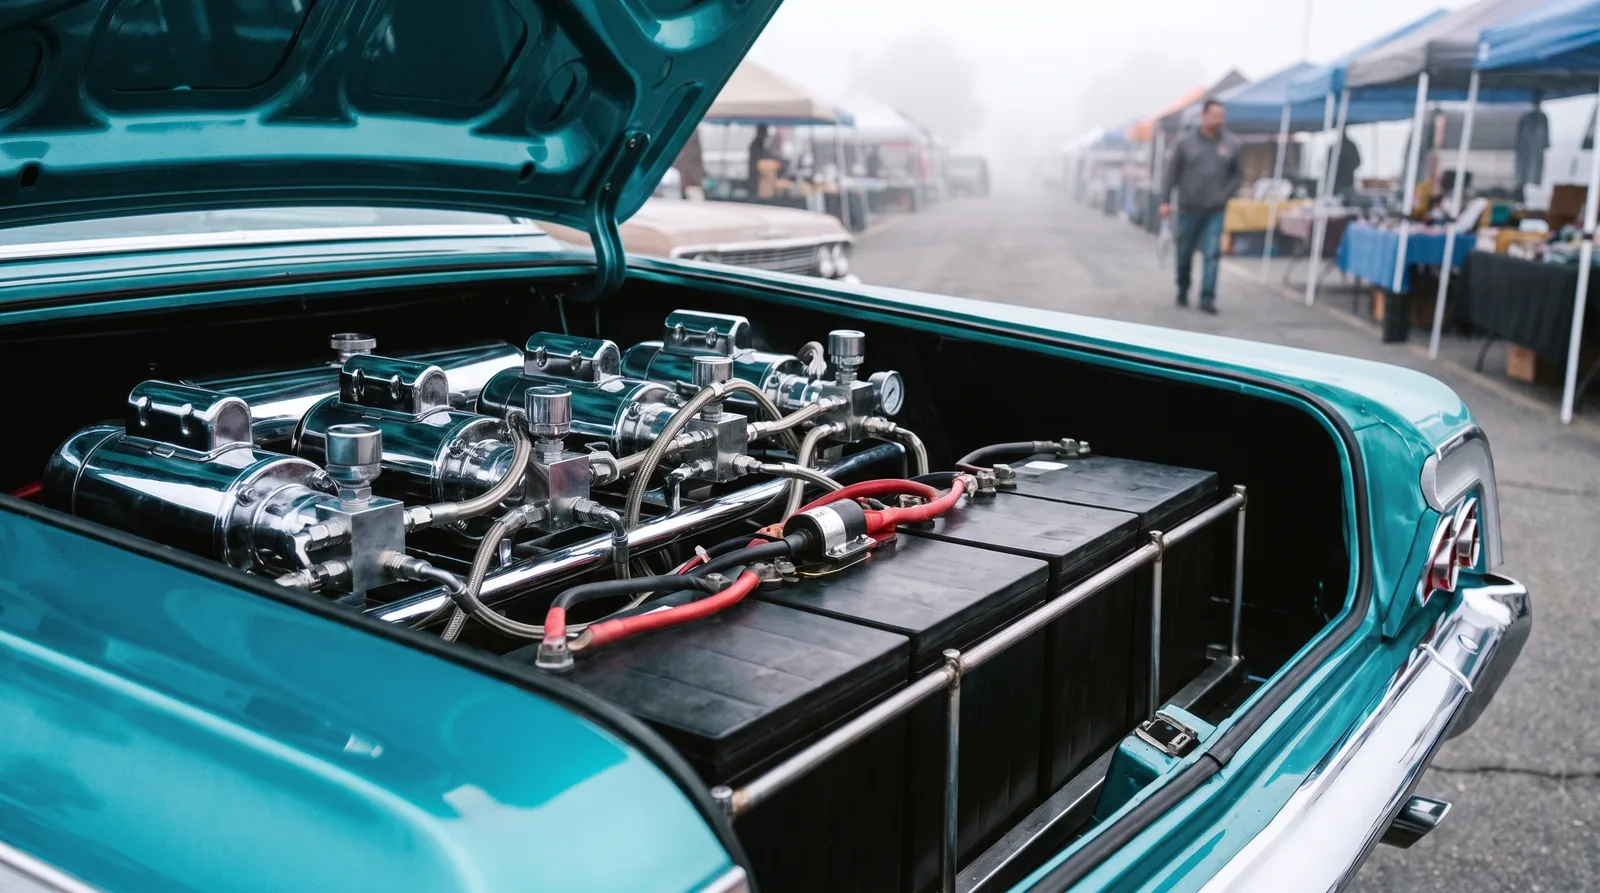
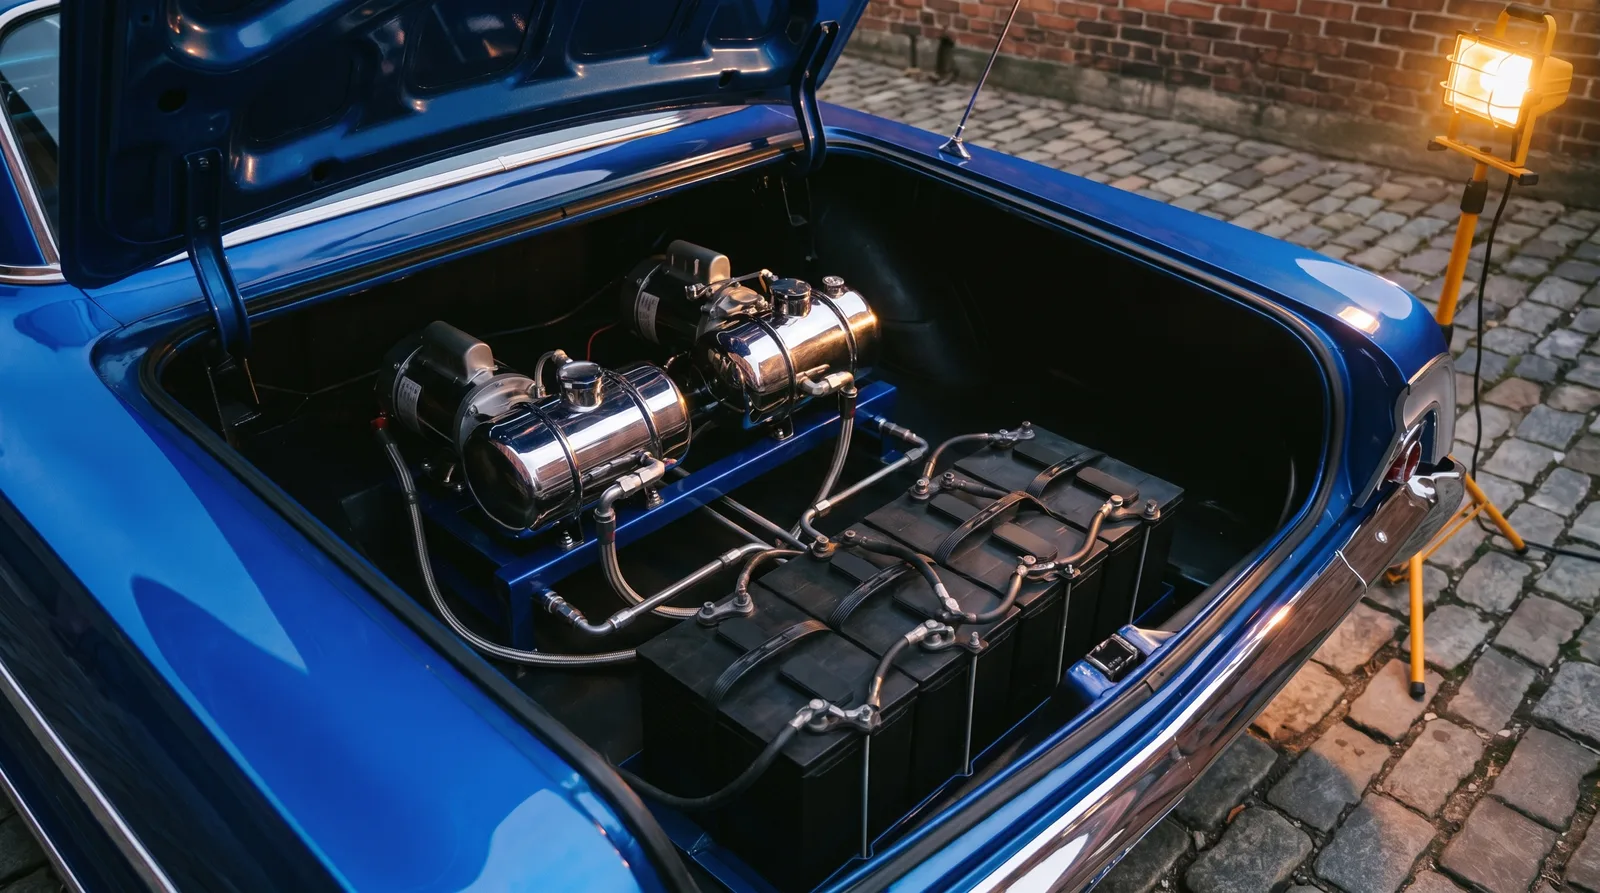
A lowrider setup is a mobile electrical plant. The batteries store the muscle, the pumps convert it into oil pressure, and the wiring is the plumbing that ties it together. This is the part of the build where people cut corners because it is hidden under the paint and chrome, and it is also the part that leaves cars stranded at the show. Do the math up front and the setup runs for years. This ties directly into the mechanical side of your lowrider hydraulics, so treat the two as one system, not two projects.
Sizing the battery bank: 6, 8, or 10
Everything in a hydraulic setup is counted in battery banks, and a bank is a set of 12-volt batteries wired in series to feed one pump. Two batteries in series make 24 volts. Three make 36. Four make 48. More voltage means the motor spins faster, the cylinder fills quicker, and the corner lifts harder. That is the whole reason hoppers stack voltage.
A car built to ride and cruise does not need a stack of ten. A car built to hop the front end off the ground does. Here is how the common configurations break down in the real world.
| Bank size | Typical voltage | Best for | Trade-off |
|---|---|---|---|
| 6 batteries | 36V–72V | Street cruiser, mild lift | Smooth, but soft on the hit |
| 8 batteries | 48V–96V | All-around, weekend hopper | Good balance of speed and weight |
| 10 batteries | 60V–120V | Serious hopping, competition | Heavy, hard on parts, big charge draw |
Run 6-volt batteries instead of 12-volt if you want more amperage in the same physical space, which is a trick a lot of hoppers use. The point is that the number of batteries alone tells you nothing. Voltage per bank is what moves the car. Use deep-cycle batteries, not the starting battery out of a parts store. Starting batteries are built to dump a big burst and get recharged by the alternator right away. A hydraulic setup drains them hard and often, and a starting battery will sulfate and die in a season.
"I have pulled brand-new car batteries out of setups that were dead in three months. Wrong battery for the job. Deep-cycle costs more up front and outlives two sets of the cheap ones."
Mike Sullivan
Pumps and solenoids: what actually lifts the car
The pump is a hydraulic motor turning a gear that pushes oil into the cylinder. The two names everybody argues about are the industrial-style block versus the aftermarket lowrider block, and both trace back to the same Adel and Aeroquip aircraft dump valves that the pioneers scavenged decades ago. What matters more than the brand on the tank is how the pump is set up.
- Single-piston pump. One gear, simple, reliable. Fine for a cruiser or a car that lifts and holds.
- Double-piston or double-return. Moves more oil per turn, fills the cylinder faster, and gives you the snap a hopper needs.
- Dump valve. The solenoid-controlled valve that drops the corner by dumping oil back to the tank. A slow dump kills a hop as badly as a weak pump.
Solenoids are the heavy-duty switches that let a small dash switch control a huge current burst. When you hit a switch, the solenoid closes and sends the full bank voltage to the pump motor in one shot. Cheap solenoids weld their contacts shut from the arc and leave a corner stuck up or, worse, running. Buy continuous-duty solenoids rated well above your working amperage, and keep spares in the trunk. They are a wear item, not a lifetime part. If you are still deciding whether to build hydraulic at all, read Airbags vs Hydraulics before you spend a dime on pumps, because the two systems ask completely different things of your electrical setup.
Wire gauge, grounds, and connections
This is where most home setups fail, and it is invisible until it burns. High voltage pushing that much current through undersized wire drops the voltage before it ever reaches the motor. Thin wire heats up, melts insulation, and steals the power you paid for in batteries. The wire between the batteries, the solenoids, and the pumps carries hundreds of amps in the instant you hit a switch.
- Battery interconnects and main runs: 2 gauge minimum, 1/0 (zero gauge) on high-voltage hopper banks. Bigger wire, less loss.
- Grounds: match the positive gauge, and ground straight to the frame and pump block with clean bare metal, not paint.
- Terminals: crimped and soldered lugs, not the pinch clamps from the auto parts aisle.
A bad ground fakes every symptom of a weak pump. The car lifts lazy, the motor bogs, and people go buy more batteries when the real problem is a green, corroded ground strap. Check your grounds first, always. Loose or corroded connections also build resistance, and resistance turns into heat right at the terminal, which is how trunk fires start.
Charging and keeping the bank alive
A big battery bank is useless if it is flat. Your car's stock alternator cannot recharge six to ten deep-cycle batteries after a night of hopping. It was sized to run headlights and a radio. You need a dedicated charging plan or the bank slowly starves.
The common setup is a bank charger, an isolated charger you plug into a wall outlet at home that charges every battery in the series string evenly. Some builders add a second high-output alternator to recover charge while cruising, but for most cars the wall charger is the honest answer: hop at the show, plug in when you get home. Charge the whole bank as a unit so the batteries stay balanced. If one battery in a series string falls behind, it drags the whole bank down and gets cooked by the others trying to push through it.
Watch water levels on flooded batteries and top them with distilled water only. Tap water minerals poison the plates. Sealed AGM batteries skip the watering but cost more and still need to be charged as a matched set. Whatever chemistry you run, replace the whole bank together. Mixing a new battery into an old string just kills the new one at the pace of the tired ones.
🔧 Inspection Priorities
- Battery age and matching. Check dates and voltages across the bank. A mismatched string is a bank that will not hold a charge. Budget a full set, roughly 90 to 200 dollars per deep-cycle battery.
- Ground straps and terminals. Look for green corrosion, loose bolts, and melted lugs. Cheap to fix, catastrophic to ignore.
- Solenoid condition. Pop the cover and check for arc pitting or a burnt smell. A welded solenoid is a stuck or runaway corner waiting to happen.
- Wire gauge and heat marks. Undersized or discolored wire means it has been running hot. Re-run it in the correct gauge before it fails.
- Charger and water levels. Confirm a working bank charger exists and flooded cells are topped with distilled water.
Sources and notes
- Builder and shop-floor interviews on hydraulic setup wiring, battery bank sizing, and solenoid selection.
- Lowrider history references covering aircraft-hydraulic origins in 1950s Southern California.
- Deep-cycle battery and charger manufacturer specifications for series-bank charging and maintenance.
- Automotive wiring gauge and current-load reference tables for high-amperage DC runs.
Related Reading


Have a
Classic Car
for Sale?
Reach thousands of serious classic car collectors across the US.
Sell It Here →
Are You a Classic Car Dealer?
List your full inventory and connect with targeted classic car buyers.
Join as a Dealer →

About the author
Mike Sullivan
Detroit-area muscle car enthusiast and restoration specialist with three decades of hands-on experience working on American iron.
More in Restoration & Tech




Comments (2)
B
Bobby Szymanski
3 months ago
Found mine through a marque club contact rather than a public listing. Paid fair value and knew exactly what I was getting. Worth the connections.
P
Paul Bergmann
2 months ago
Color combinations matter more than most buyers think. Original paint codes add real value; wrong-era repaints subtract from it.