
Most C10s running rear drum brakes are driving around with a pedal that's softer than it needs to be, and the owner just accepts it as how old truck brakes feel. That's not right. A properly adjusted set of rear drums should give a firm pedal with predictable stopping, not a mushy feeling that makes you leave extra following distance out of habit. Drum brakes have a reputation for being vague compared to discs, but a lot of that reputation comes from trucks that simply haven't been adjusted in years, not from any real shortcoming in the design.
Restoration & Tech
7 min read
Servicing and Adjusting Rear Drum Brakes on a C10
How to properly adjust rear drum brakes on a classic C10, diagnose a seized self-adjuster, and stop living with a soft pedal that isn't actually a design flaw.
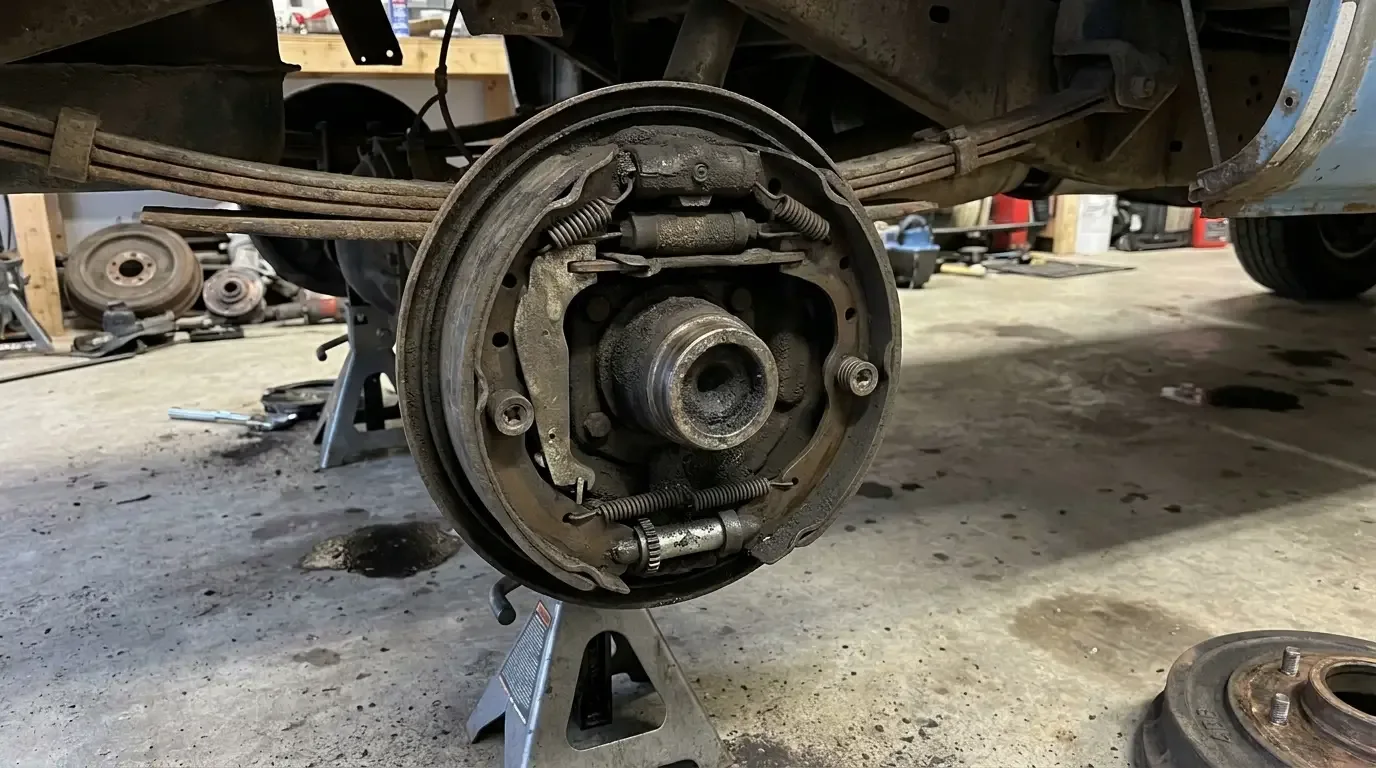
These trucks came from the factory with a self-adjusting mechanism meant to keep the shoes close to the drum as they wear, and on paper that means you'd never need to touch it manually. In practice, self-adjusters seize up, cables stretch or rust, and a truck that's sat for any length of time between drives often needs a manual adjustment to get back to where it should be. Knowing how to do that properly is worth more than most people realize.
How the self-adjuster is supposed to work, and why it often doesn't
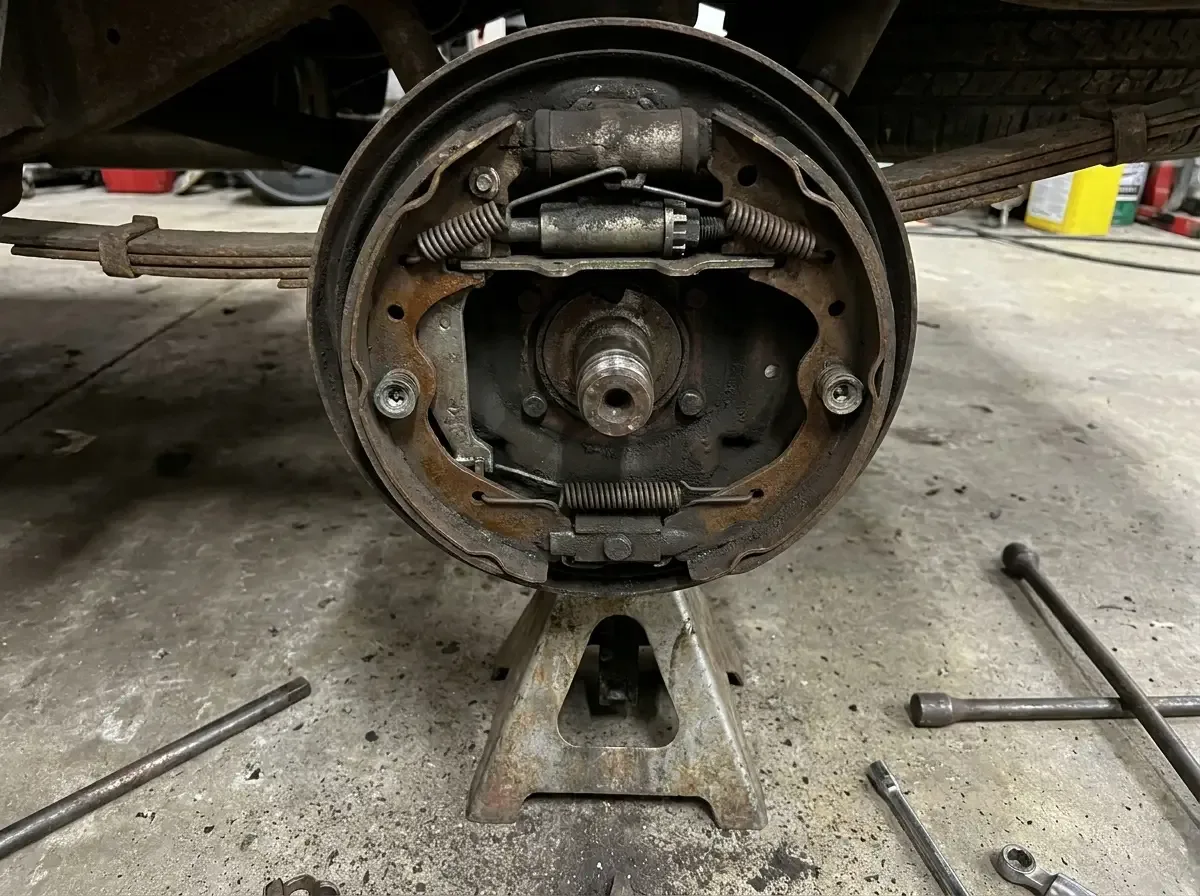
The self-adjusting mechanism on these rear drums uses a star wheel adjuster connected to a cable or lever that's supposed to advance a notch every time you back up and apply the brakes, taking up slack as the shoes wear down. It's a good system when everything's clean and moving freely, but the adjuster mechanism lives inside the drum where it's exposed to brake dust, moisture, and years of grime, and it seizes up more often than people expect, especially on trucks that don't get driven in reverse enough to actually trigger the mechanism.
A truck that's mostly driven forward, or one that's sat parked for long stretches, often ends up with an adjuster that's rusted solid in one position while the shoes wear well past where they should have advanced. That mismatch is exactly what gives drum brakes their soft-pedal reputation. It's not the design. It's a maintenance item that got skipped.
Manual adjustment, done the right way
With the truck safely on stands and the wheel off, find the adjustment slot on the backing plate, usually covered by a small rubber plug, and use a brake adjustment tool or a flat screwdriver to turn the star wheel through that access hole. Spin the drum by hand as you adjust, tightening the star wheel gradually until the drum starts to drag noticeably against the shoes, then back it off just enough that the drum spins freely again with only light contact. That light drag point is the correct adjustment. Too loose and the pedal travels too far before it bites. Too tight and the shoes drag constantly, generating heat and wearing prematurely.
Do this on both rear wheels evenly, since a truck with one side adjusted tighter than the other will pull under braking, which is unsettling at speed and unnecessary to live with when the fix takes a few extra minutes on each side. After adjusting, pull the drum back off and confirm the shoes are actually contacting evenly across their full arc, not just at one edge, since uneven contact points to a shoe that's not seated correctly on the backing plate.
| Symptom | Likely cause | Fix |
|---|---|---|
| Soft, long pedal travel | Shoes adjusted too loose, or seized self-adjuster | Manual star wheel adjustment on both rear drums |
| Drum drags or wheel feels hot after driving | Shoes adjusted too tight | Back off the star wheel until the drum spins freely |
| Truck pulls to one side under braking | Uneven adjustment side to side | Re-adjust both sides to match, check for a stuck wheel cylinder |
| Self-adjuster won't engage during use | Seized adjuster mechanism or broken cable | Disassemble, clean, and lubricate, or replace the adjuster hardware |
Cleaning and lubricating the adjuster mechanism
If the star wheel won't turn under normal hand pressure, don't force it with excessive leverage before checking why it's stuck. Pull the drum, remove the adjuster assembly, and clean off the accumulated rust and brake dust with a wire brush before applying a high-temperature brake grease to the threads and the pivot points. A seized adjuster that gets forced rather than cleaned properly will usually seize again within a few months, since the underlying corrosion never actually got addressed.
This is also the point to inspect the springs holding everything in tension, since weak or stretched springs won't hold the shoes against the adjuster properly even after you've freed it up. Springs are cheap. Replacing them while everything's already apart is a much better use of the time than reassembling with tired springs and having to do this whole job again sooner than you should.
Living with drum brakes on a truck that gets driven
Drum brakes done right aren't a compromise on a truck like this. They stop the truck predictably, they're simple to service with basic tools, and parts are cheap and widely available, which matters on a vehicle you actually intend to drive rather than trailer to shows. The reputation drums have for feeling vague almost always traces back to trucks running years-old adjustment and hardened original hardware, not to any real limitation in what the system can do when it's maintained.
Keeping the brakes in good adjustment is part of the same routine that goes into maintenance guide work generally, small checks done on a schedule instead of waiting for a problem to announce itself with a long pedal on a wet road. And while you've got the truck up on stands for brake work, it's worth checking overheating, the other classic stop-and-go problem, since both issues tend to show up hardest in the same kind of driving, slow traffic with a lot of stopping and starting.
"I hear people say they'd rather just convert to discs than deal with adjusting drums, and sometimes that's the right call for other reasons. But plenty of these trucks are running drums that haven't been properly adjusted since somebody's dad owned it. Adjust them right and drive it a week before you decide the brakes themselves are the problem."
Robert Halloran
Why this traces back to the truck's working-truck roots
Drum brakes on a half-ton like this were never an afterthought. They were part of Chevrolet's half-ton legacy of building a truck that could be serviced with hand tools in a farm shop or a driveway, and that same simplicity is still an advantage decades later for anyone willing to spend an afternoon getting the adjustment right. A truck with properly maintained drums stops as well as most people need it to, and it does it with parts you can find at any parts counter without a special order.
Sources and notes
- Know Your Parts (Standard Motor Products) -- how drum brake self-adjusters work
- R1 Concepts -- self-adjusting drum brake mechanism explained
- Brake & Front End -- understanding drum brake self-adjusters
- Advance Auto Parts -- how to adjust drum brakes
- Classic Broncos Forum -- star wheel adjuster direction
- CarParts.com -- quick guide to adjusting drum brakes
Related Reading
Have a
Chevrolet C10
for Sale?
Reach thousands of serious classic car collectors across the US.
Sell It Here →
Are You a Classic Car Dealer?
List your full inventory and connect with targeted classic car buyers.
Join as a Dealer →

About the author
Robert Halloran
Texas-based classic truck enthusiast with decades of experience buying, restoring, and writing about American pickups from the 1940s through the 1980s.
Related Listings - Chevrolet C10
More in Restoration & Tech




Comments (1)
B
Bobby Szymanski
2 weeks ago
The point about project cars hiding real costs needs to be said louder. I've seen people 'save' $5k on purchase price and spend $40k on what they didn't know about.