
Every time I get a "Judge" in the shop for a pre-purchase inspection, the decals are the first thing I check, not the last. Most guys walk around the car admiring the graphics before they even pop the hood. I do it backwards. If the decals are wrong, wrong colors, wrong placement, wrong script, that tells me something about the rest of the car before I've even checked a compression number. Bad decals usually mean somebody built a Judge clone out of a plain GTO, and that changes the whole conversation about price.
Car Features
7 min read
'Here Comes the Judge': The Decals and Stripes Decoded
The decals are the first thing I check on a Judge, not the last. Get them wrong and it tells you something about the rest of the car.
What the factory actually put on the car
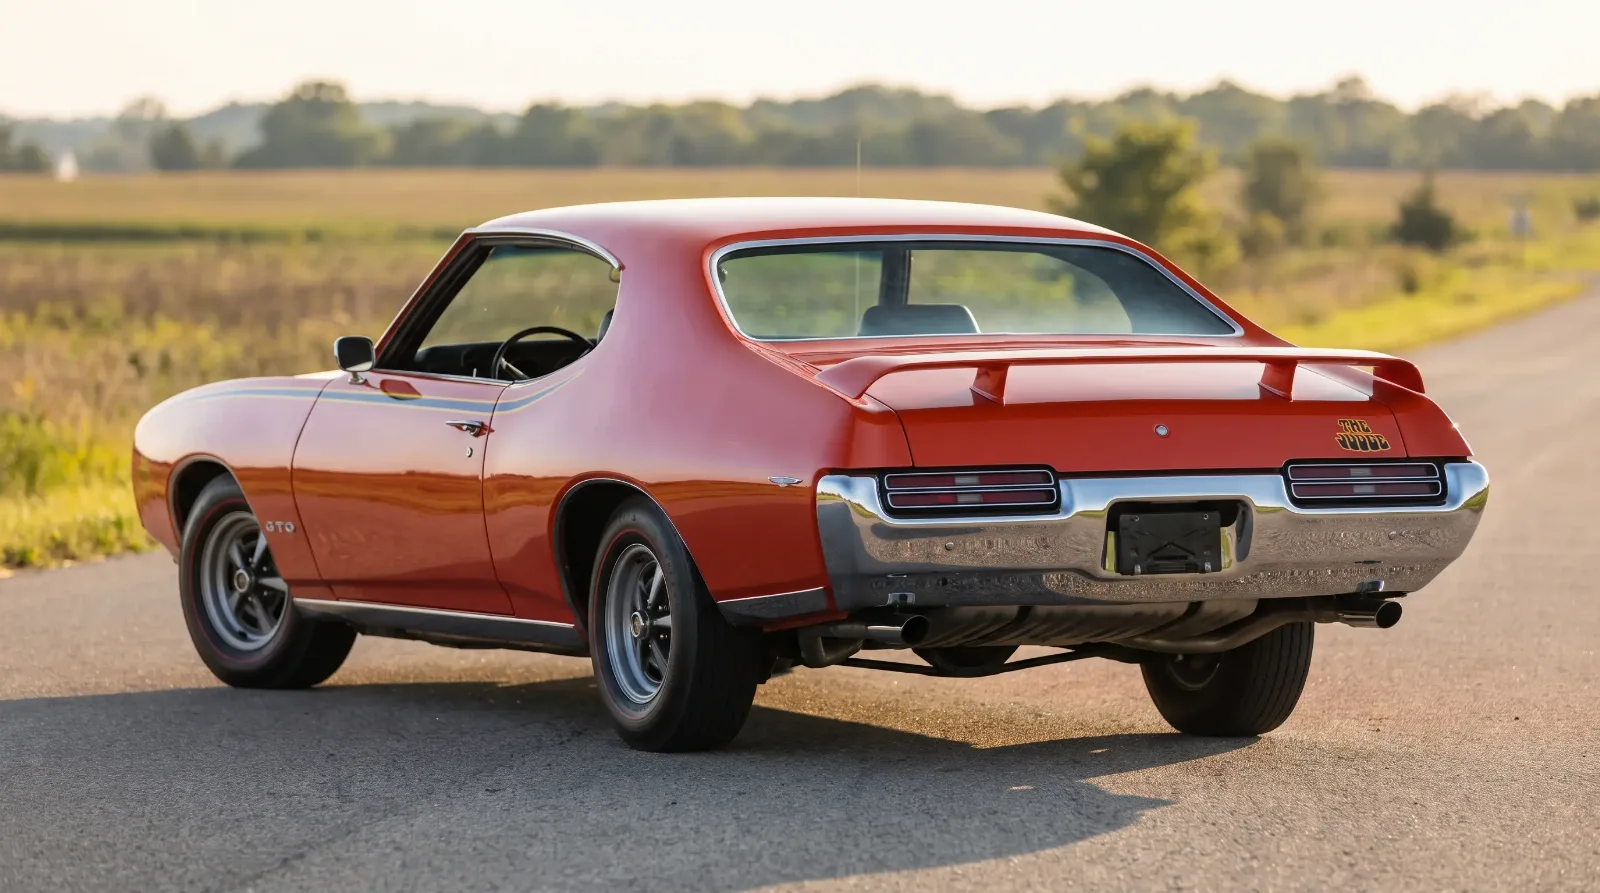
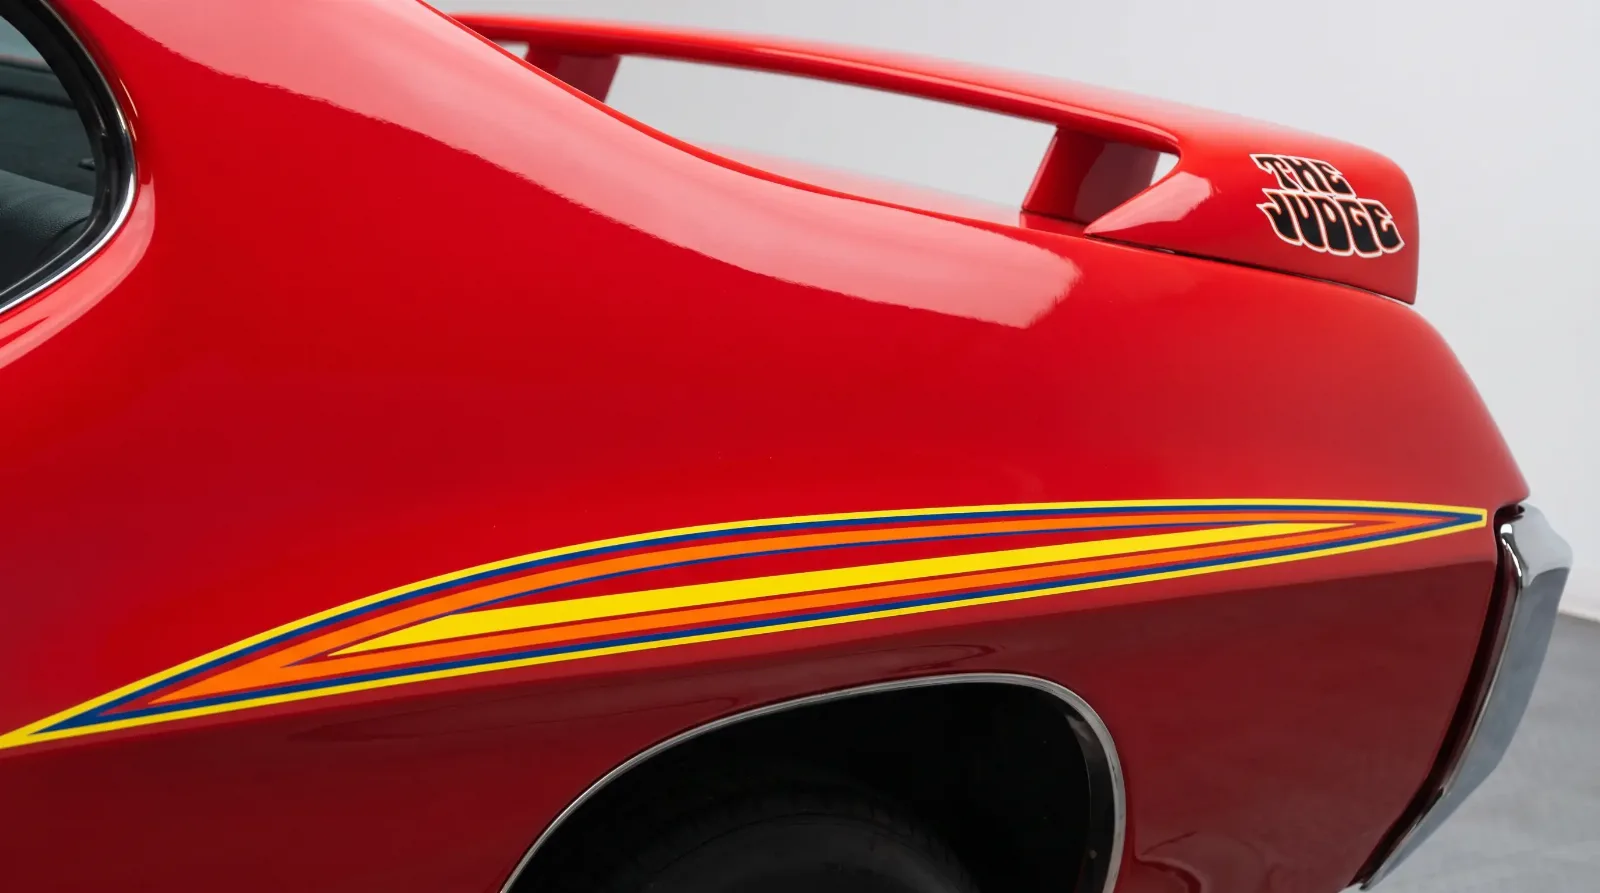
The 1969 Judge came with a specific multicolor stripe package running low along the rocker panels and lower body, and the exact colors depended on which body color the car left the factory wearing. Black, white, blue, turquoise, silver, and Carousel Red cars got yellow, red, and blue stripes; the green cars and Mayfair Maize got white, yellow, and olive; and the brown, burgundy, and Matador Red cars got white, red, and black. Partway through the 1969 model year, in February, Pontiac shifted the scheme again on several colors, most notably swapping Carousel Red from yellow/red/blue to white/red/black. That stripe wasn't a single solid color like you'd find on a lot of other muscle cars from the era. It was a layered graphic, and getting the layering and color order right on a repro decal set matters more than most restoration shops want to admit. I've seen kits sold as "correct Judge decals" that have the color bands in the wrong sequence, and once you know what to look for it jumps out immediately.
On the rear, Pontiac added "The Judge" script to the trunk lid and, depending on the year, to the rear spoiler itself. The spoiler was a genuine functional piece, not just a decal mount, molded to bolt onto the rear deck and give the car its distinct silhouette from behind. A Judge without the correct spoiler shape, even with the right decals slapped on, is not a correct car. I've turned away inspection jobs where the seller wanted me to confirm authenticity on a car that had an aftermarket spoiler from a completely different generation bolted to the trunk.
| Decal element | Location | What to check |
|---|---|---|
| Multicolor stripe | Lower body, rocker panels | Correct color band sequence and width |
| "The Judge" script | Trunk lid, rear spoiler | Correct font, correct placement height |
| Front fender callouts | Front fenders | Engine displacement matches actual block |
| Rear spoiler | Trunk deck | Correct factory profile, proper mounting holes |
Why a lot of these cars have the wrong decals today
Original decals from 1969 didn't hold up well. The vinyl and adhesive Pontiac used was fine for a car expected to last a few years of hard driving, not fine for surviving five decades of sun exposure, garage storage, and the occasional bad wax job. By the time most of these cars hit their second or third owner, the original decals were peeling, faded, or gone entirely, and owners replaced them with whatever kits were available at the time. Reproduction decal quality has improved a lot over the last twenty years, but there was a long stretch in the eighties and nineties where correct kits simply weren't available, and a lot of cars from that period got decals that were close but not exact.
That's not a knock on those owners. They were doing their best with what existed. But it means a buyer today has to actually know what correct looks like instead of assuming any Judge-branded decal kit on a car is automatically right. I keep a reference binder in the shop with original factory photos specifically for this reason, because memory alone isn't reliable when you're comparing color bands against a fifty-year-old advertisement.
Installation tricks that actually matter
If you're putting a correct reproduction kit on a restored car, temperature and surface prep matter more than most first-timers expect. Vinyl decals of this size, especially the lower body stripe, need a warm, dust-free environment to lay down without air bubbles, and rushing the install is the single most common mistake I see. I always tell guys doing this at home to do a dry fit first, tape the whole decal in position without removing the backing, and confirm alignment against the body lines before committing to the adhesive. Once that stripe touches the paint, repositioning it without stretching or tearing the vinyl gets a lot harder.
Body line alignment is where amateur installs go wrong most often. The factory used specific reference points, usually the wheel opening and the lower character line of the body, to set stripe height consistently across every car on the line. An installer eyeballing it without those reference points will often end up with a stripe that's technically straight but sits at a slightly different height than a factory original, which is exactly the kind of detail a knowledgeable judge at a car show will catch immediately.
"I've fixed more decal jobs than I've installed from scratch. Get the reference points right the first time or you'll be pulling vinyl off paint you just refinished."
Mike Sullivan
Tools and supplies I actually use
I also tell people not to skip the trim tag and cowl tag check before they even think about decals. A car with correct decals and a mismatched trim tag is still a problem car, just a well-dressed one. The decals are the last five percent of a correct restoration, not the first thing that determines whether a car is legitimate. I bring this up because I've seen buyers get so focused on graphics accuracy that they forget to check the parts of the car that actually determine matching-numbers status and real value.
What this means for buyers
If you're shopping for a Judge and the decals look immaculate, ask when they were installed and by whom. A recent, correctly done reproduction install is fine and honestly preferable to sun-damaged originals on a driver-quality car. What you want to avoid is a seller implying the decals are original factory work when they're clearly a modern reproduction, because that kind of vague description usually shows up alongside other details that don't hold together under closer inspection. Ask for close-up photos of the color bands, the script lettering, and the spoiler mounting points before you make a trip to see the car in person.
None of this is complicated once you've seen enough of these cars in person. It just takes actually looking instead of getting caught up in how good a fresh decal job looks from ten feet away in good lighting. Every seller's photos look great from ten feet away. Get close before you write a check.
For the fuller background on how the Judge package came together, including the decisions that led to this specific graphics treatment, the story of the Judge covers the whole build from the ground up. And if you want to see how far Pontiac took this car's public image in 1969, including a promotional tour that put the Judge in front of small towns across the country, read on.
Sources and notes
Related Reading

Have a
Pontiac GTO
for Sale?
Reach thousands of serious classic car collectors across the US.
Sell It Here →
Are You a Classic Car Dealer?
List your full inventory and connect with targeted classic car buyers.
Join as a Dealer →

About the author
Mike Sullivan
Detroit-area muscle car enthusiast and restoration specialist with three decades of hands-on experience working on American iron.
Related Listings - Pontiac GTO
Comments
Be the first to comment on this article.